Thursday, March 6, 2014
Resourcefulness Knows No Boundary Idea Wood Working Tactics
Creativity knows no boundary, especially if you’re dealing with a very versatile medium such as wood. It is probably the most durable and most common medium around. The possibilities are endless. Imagine from building houses to furniture’s, to the most extraordinary bat house. But what if you could build one yourself? Would that be better? Imagine wanting a bed you’d like to sleep on at night, but finding the paint color awful for your taste. Or Sitting on a very comfortable chair, but not liking the engraving that was carved into the wood. Imagine building your own furniture, doing your own design? Wouldn’t that be refreshing and fulfilling? Find a good hobby perhaps, but a very useful one.
Most of us have these ideas in our heads about what our things should look like, and sometimes when we go to a store and find something that we actually like, it’s very rare that we do not find fault in the articles that we ourselves choose. Most of us have the ability to design, the problem would be the frame work, the foundation of how furniture should stand and not fall down. The good thing about "woodworking free plans" is that, it provides you with the know-how, but giving you the free hand to do the finishing touches. It gives you the ability to be unique and at the same time giving you the free hand to make your own measurements. Sometimes we find things that we like in an inappropriate size. Almost like wearing a very nice shoe that does not fit. And well when you say wood, it does not necessarily mean hard wood, could mean nippa or rattan. And although wood is pretty in itself even without the varnishing and paint. It is flexible in its own way that it usually fits everybody’s taste. It could be Acacia or Molave. Or you could just change the paint to mimic the wood of your choice. With these ideas the possibilities are endless.
But what if you are not looking for ordinary furniture, but let’s say you’re looking for a doll house, yeah it sounds common I know, but try to look for this in the store, the choices are quite so limited. But if you could build one on your own, well talk about one of a kind. Maybe you could build your own neighborhood of doll houses. And each house would look different from each other. If you have a daughter maybe she could start inviting her friends over and have a little neighborhood in your very own living room.
Aside from giving you a free hand in design and a wide range of choices, "Woodworking free plans" could be your answer to cost cutting problems. It may be tedious work but I guess fulfilling in the end.
If you want to get more tips like this, then you should get a copy of the IDEA WOOD WORKING PLANS. It is a great a comprehensive guide which will teach you every thing you need to know about wood working!
Click here ==> IDEA WOOD WORKING PLANS REVIEW To read more about this guide.
Read More..
Most of us have these ideas in our heads about what our things should look like, and sometimes when we go to a store and find something that we actually like, it’s very rare that we do not find fault in the articles that we ourselves choose. Most of us have the ability to design, the problem would be the frame work, the foundation of how furniture should stand and not fall down. The good thing about "woodworking free plans" is that, it provides you with the know-how, but giving you the free hand to do the finishing touches. It gives you the ability to be unique and at the same time giving you the free hand to make your own measurements. Sometimes we find things that we like in an inappropriate size. Almost like wearing a very nice shoe that does not fit. And well when you say wood, it does not necessarily mean hard wood, could mean nippa or rattan. And although wood is pretty in itself even without the varnishing and paint. It is flexible in its own way that it usually fits everybody’s taste. It could be Acacia or Molave. Or you could just change the paint to mimic the wood of your choice. With these ideas the possibilities are endless.
But what if you are not looking for ordinary furniture, but let’s say you’re looking for a doll house, yeah it sounds common I know, but try to look for this in the store, the choices are quite so limited. But if you could build one on your own, well talk about one of a kind. Maybe you could build your own neighborhood of doll houses. And each house would look different from each other. If you have a daughter maybe she could start inviting her friends over and have a little neighborhood in your very own living room.
Aside from giving you a free hand in design and a wide range of choices, "Woodworking free plans" could be your answer to cost cutting problems. It may be tedious work but I guess fulfilling in the end.
If you want to get more tips like this, then you should get a copy of the IDEA WOOD WORKING PLANS. It is a great a comprehensive guide which will teach you every thing you need to know about wood working!
Click here ==> IDEA WOOD WORKING PLANS REVIEW To read more about this guide.
Wednesday, March 5, 2014
Clamp rack follow up
Answering a few questions about yesterdays clamp storage video.
*****
Hey, if you havent picked up the latest issue of Wood Magazine, its worth buying for page 20 alone.

Read More..
*****
Hey, if you havent picked up the latest issue of Wood Magazine, its worth buying for page 20 alone.
Planes and more planes
Its interesting to see what people collect. Paul has a lot of vises, but Stig has planes.
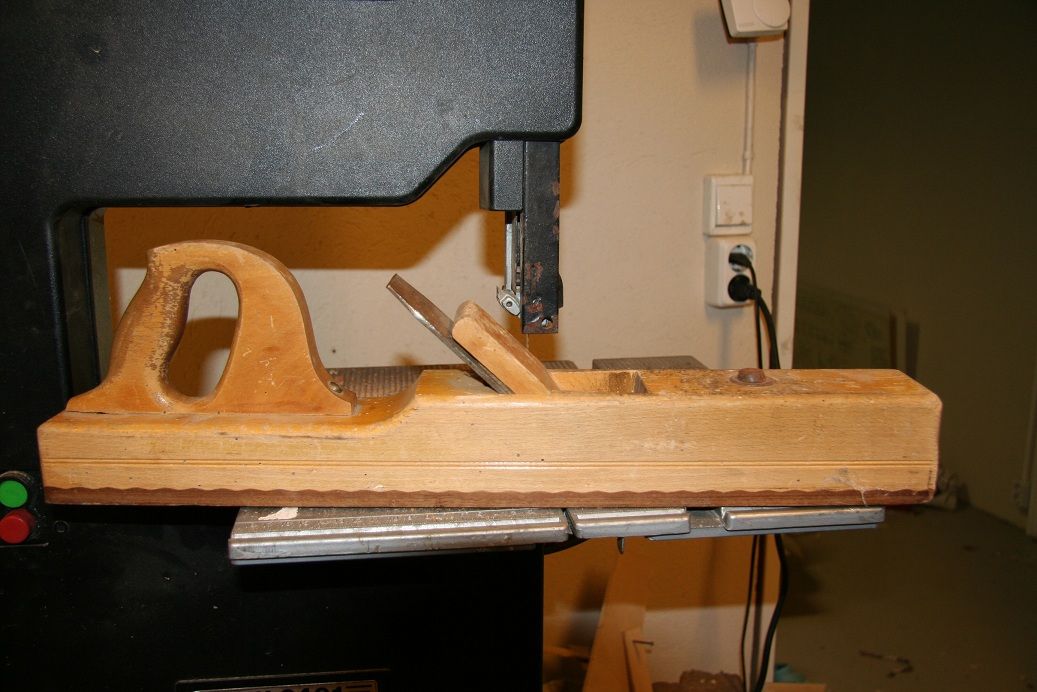
You might remember Stig Schjervheims mousetrap from back in June. This time, hes sent over pictures of his plane collection, all of which he uses. Stig also has a nice take on the art of planing:
Read More..
You might remember Stig Schjervheims mousetrap from back in June. This time, hes sent over pictures of his plane collection, all of which he uses. Stig also has a nice take on the art of planing:
When it comes to meditation, nothing’s like the swooshing sound of a sharp plane on mellow wood. You start planing a board for a drawer front, getting intoxicated by the sound of blade against fiber. Before you know it your drawer front is planed down to paper thin, and you have to start over with another board. If it continues like this, you could always make a career making veneer sheets.
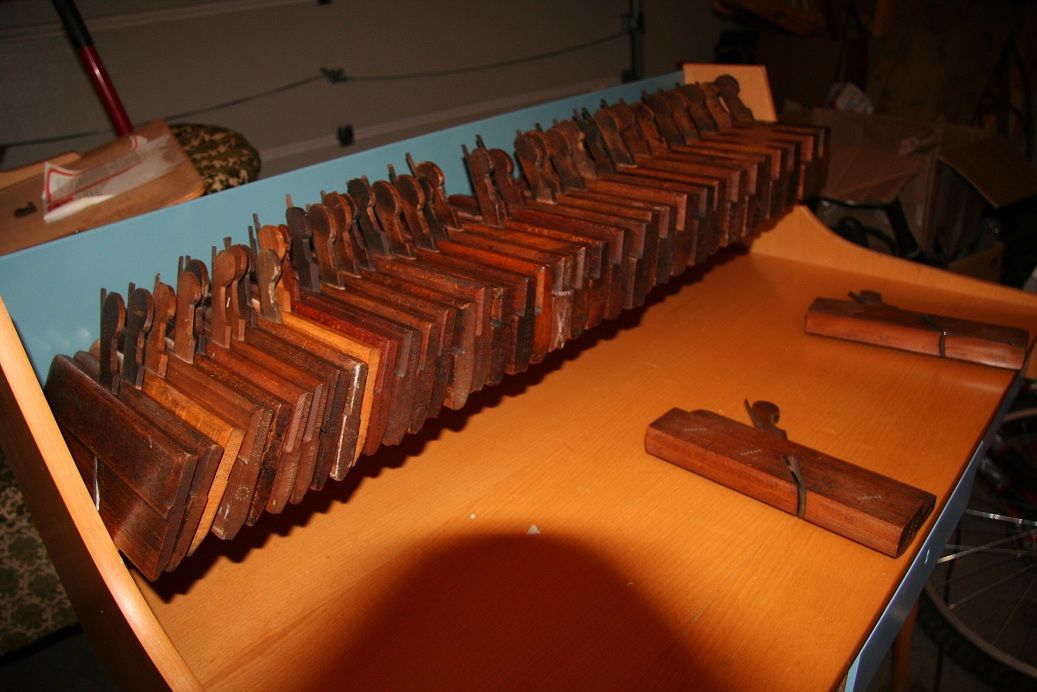 |
| My set of 38 hollows and rounds. Not all from the same maker, but still good for making any profile molding you can think of. |
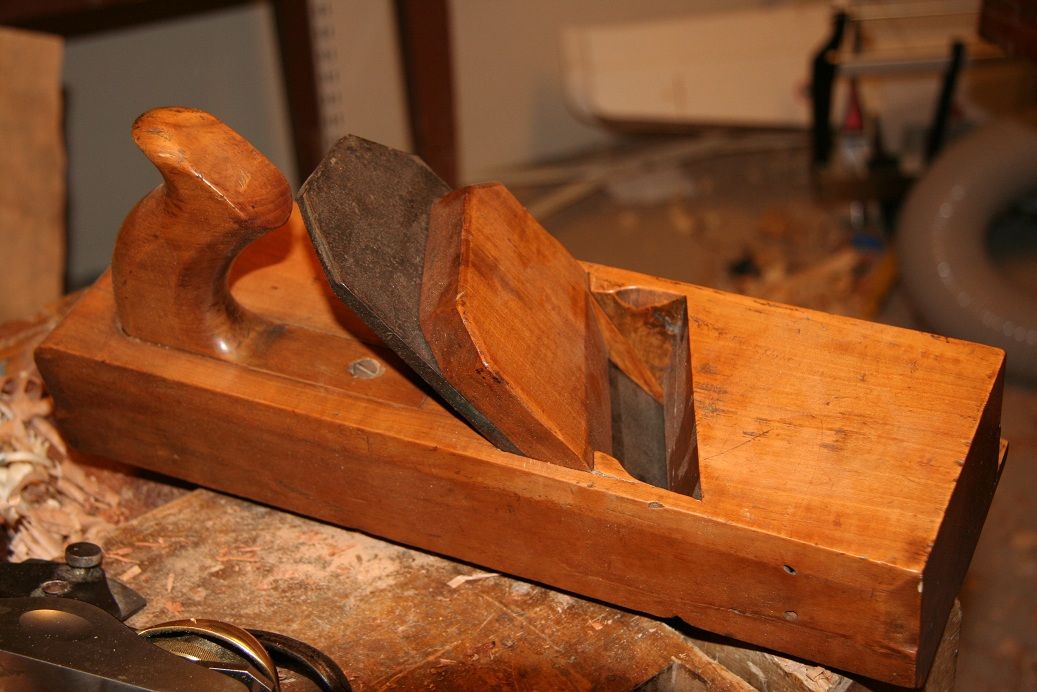 |
| My big panel raiser. For door panels. |
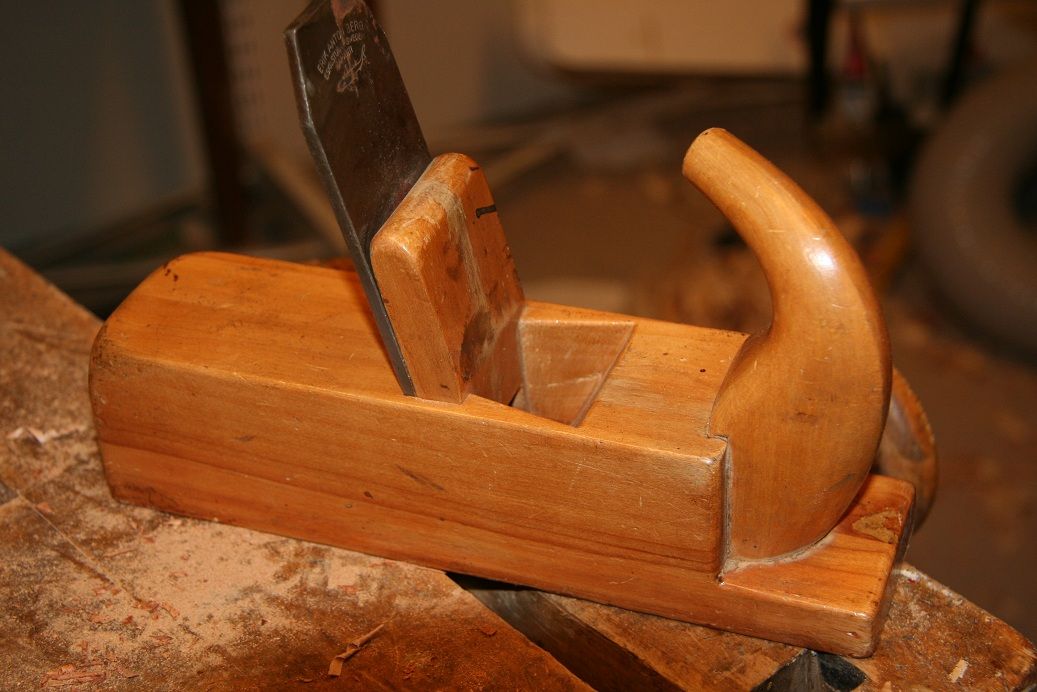
 |
| Smaller panel raiser. For cabinet doors and such. Had to replace the sole on this one. |
 |
| Tooth plane for veneering |
 |
| Don’t even know what this is for. It’s Swedish. |
 |
| My big jointer |
 |
| I guess you would call this a fore plane. |
 |
| A couple of Stanley 45’s |
 |
| A Stanley combined shoulder and bullnose |
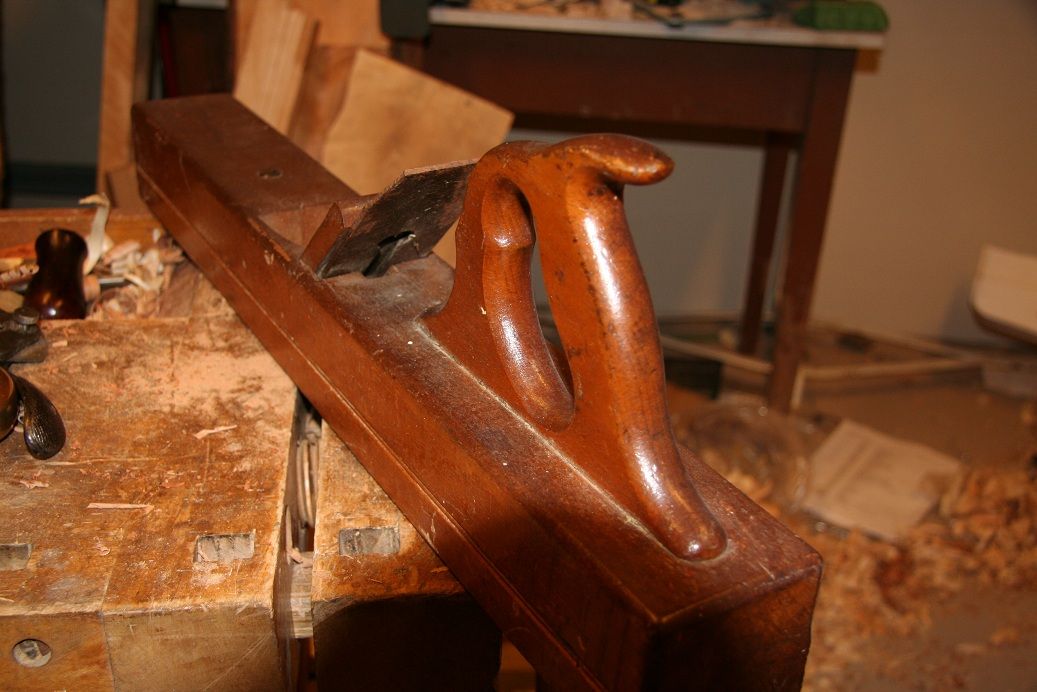
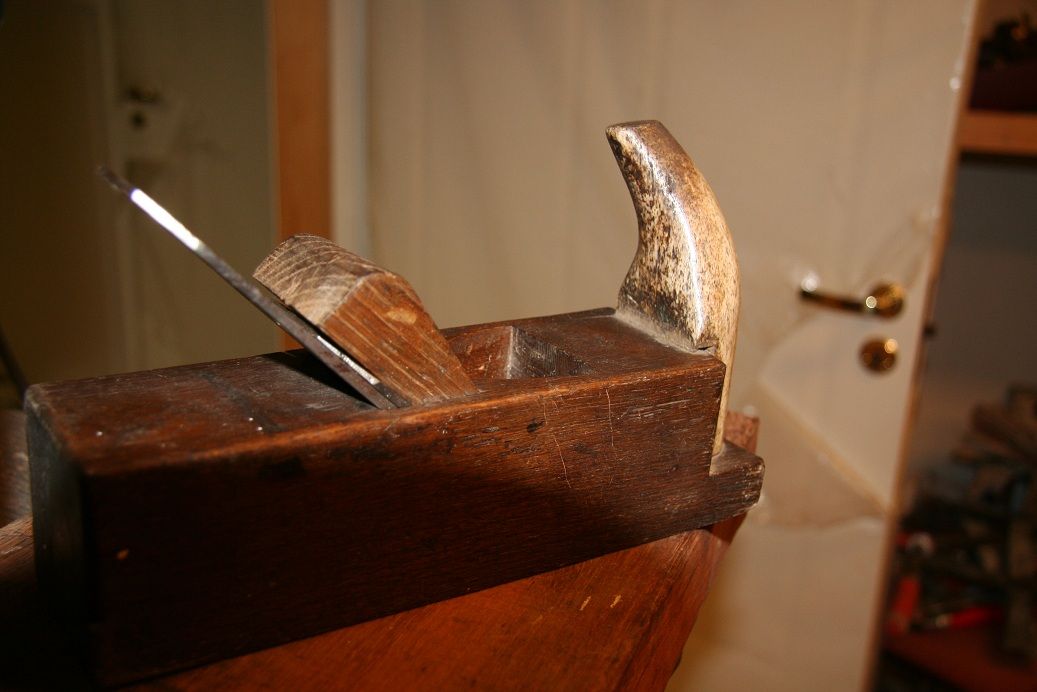 |
| A Norwegian jack plane. Notice the tote made of horn. |
 |
| A match plane for tongue and groove. |
 |
| My router plane of newer date. |
 |
| Plough, or Plow plane depending on if you are English or American I guess. |
 |
| A compass plane. |
Tuesday, March 4, 2014
A Very Special Christmas Special
I knew rounding up a bunch of woodworkers would be similar to herding cats, so I began working on this video back in early September.
I want to thank these guys for taking time out of their schedules to shoot five minutes of video of which I would end up using only a few seconds. And mostly out of context!
Visit their web sites:
- George Vondriska, Woodworkers Guild of America.
- Matthias Wandel, Woodgears.
- Alain Vaillancourt, The Woodpecker.
- David Marks, Woodworks.
- Matt Vanderlist, Matt’s Basement Workshop.
- Shannon Rogers, The Renaissance Woodworker.
- Alex Harris, This Woodwork.
- Jon Burros.
- Laney Shaughnessy, A Simple Design of Ocala.
- Marc Spagnuolo, The Wood Whisperer.
- Carl Jacobson, The Woodshop.
- Brian Grella, Garage Woodworks.
- Todd Clippinger, American Craftsman Workshop.
- Charles Neil, Charles Neil Woodworking.
Merry Christmas!
Table Glue Up
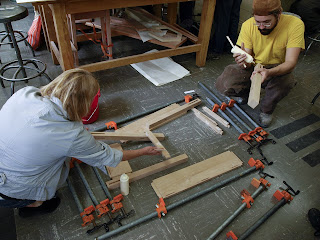
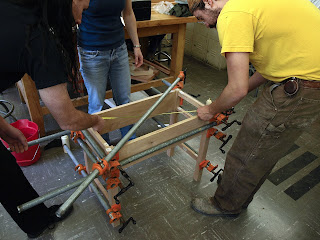
Nancy and Andrew lay out the table legs and aprons for the glue-up.

Nancy and Andrew glue-up the legs while Tracy and Adam wipe off any glue that might have spilled out from the mortises.
It takes a lot of folks for the job so, be sure to have classmates and/or friends near by!

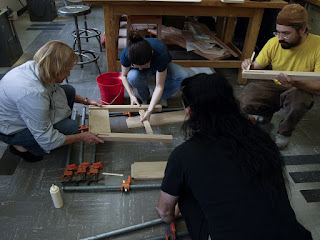
Andrew and Adam assemble the legs and tenons so, a drawer will fit between the top two braces.

Tracy and Adam clamp the width first. They work fast before the glue sets up!

Tracy continues to wipe any excess glue off the wood. You go girl!
Adam and Andrew clamp and measure the diagonal of the table to make sure it is square.
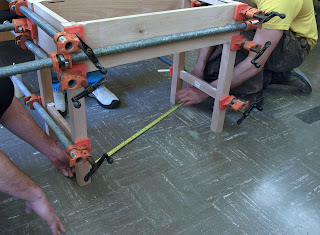
It is also important to measure the diagonal from the bottom of the legs.

Phillip sands the last leg for his "Octopus" table. Shannon and Ginny discuss various options for Ginnys oval table top.
A Basic Guide to Build a Storage Building The Roof
By [http://ezinearticles.com/?expert=Don_Koenig]Don Koenig
When you build storage building it is crucial to pay close attention to the roof. Look, not surprisingly, a shed is a building built to protect the things you decide to store in it. A garden shed stores garden tools and equipment. A simple storage shed may be home for holiday decorations for all seasons. Storage implies that the items you store in the shed are protected from the ravages of the elements. Rain and snow must be kept on the outside, not flowing into the inside. In truth, it all begins with a sturdy, waterproof roof.
Building a sturdy, durable roof is an investment well worth the initial coat. Remember, your shed roof is exposed directly to the weather. It must shed rain, protect from snow, keep out dust and dirt and generally act as the first line of defense against the elements. By building a sound roof means that youll spend far less in roof repairs over the years saving you a ton of hard earned cash. Youll also provide powerful protection for the contents of the shed itself. Of course, building a strong roof means youll need a well thought out plan for this aspect of the construction of your shed.
Here are just a few things to keep in mind when looking for the right approach to roof construction:
� Your roof design must have a built in slant. Even a flat roof has a 2 to 3 degree pitch to one side. A peaked roof relieves pressure, especially from the weight of wet, heavy snow and is better for colder climates.
� Make sure that your roof design complies with local building codes. Once the design is approved it may pay to have your roof trusses prefabricated for you. Many lumber yards will do this for a small fee.
� Once the walls of your shed are up and the trusses are fabricated, mark the top of the walls where the trusses will be placed. Remember to measure twice and cut but once.
� Place the trusses on their marks and nail them in place. If your design calls for a ridge board, install it now making sure that everything is plumb and sturdy.
� Now it is time to place the roof decking. Nail your decking in place. Your roof is now structurally sound.
� Install your roofing shingles according to the manufacturers instructions. Place any underlayment material on the decking first and then apply the shingles. Be certain to have metal flashing in place where required.
Make certain you follow safety procedures. Working on a roof can be dangerous. It is best to have a helper when working on your roof in order to make the job go smoothly. As you build the storage building, it pays to focus your attention on the roof in order to assure your long-term investment.
Don Koenig has been a professional carpenter and woodworker for over 25 years. He offers tips and ideas for building sheds an other woodworking projects at [http://www.designsforsheds.com]Designs for Sheds. Right now he is offering a free gift of a 24 page basic shed plan for a [http://www.designsforsheds.com/build-storage-building]12 x 8 Shed. Why not visit his site and see what all the fuss is about.
Article Source: [http://EzineArticles.com/?A-Basic-Guide-to-Build-a-Storage-Building:-The-Roof&id=6670773] A Basic Guide to Build a Storage Building: The Roof
Read More..
When you build storage building it is crucial to pay close attention to the roof. Look, not surprisingly, a shed is a building built to protect the things you decide to store in it. A garden shed stores garden tools and equipment. A simple storage shed may be home for holiday decorations for all seasons. Storage implies that the items you store in the shed are protected from the ravages of the elements. Rain and snow must be kept on the outside, not flowing into the inside. In truth, it all begins with a sturdy, waterproof roof.
Building a sturdy, durable roof is an investment well worth the initial coat. Remember, your shed roof is exposed directly to the weather. It must shed rain, protect from snow, keep out dust and dirt and generally act as the first line of defense against the elements. By building a sound roof means that youll spend far less in roof repairs over the years saving you a ton of hard earned cash. Youll also provide powerful protection for the contents of the shed itself. Of course, building a strong roof means youll need a well thought out plan for this aspect of the construction of your shed.
Here are just a few things to keep in mind when looking for the right approach to roof construction:
� Your roof design must have a built in slant. Even a flat roof has a 2 to 3 degree pitch to one side. A peaked roof relieves pressure, especially from the weight of wet, heavy snow and is better for colder climates.
� Make sure that your roof design complies with local building codes. Once the design is approved it may pay to have your roof trusses prefabricated for you. Many lumber yards will do this for a small fee.
� Once the walls of your shed are up and the trusses are fabricated, mark the top of the walls where the trusses will be placed. Remember to measure twice and cut but once.
� Place the trusses on their marks and nail them in place. If your design calls for a ridge board, install it now making sure that everything is plumb and sturdy.
� Now it is time to place the roof decking. Nail your decking in place. Your roof is now structurally sound.
� Install your roofing shingles according to the manufacturers instructions. Place any underlayment material on the decking first and then apply the shingles. Be certain to have metal flashing in place where required.
Make certain you follow safety procedures. Working on a roof can be dangerous. It is best to have a helper when working on your roof in order to make the job go smoothly. As you build the storage building, it pays to focus your attention on the roof in order to assure your long-term investment.
Don Koenig has been a professional carpenter and woodworker for over 25 years. He offers tips and ideas for building sheds an other woodworking projects at [http://www.designsforsheds.com]Designs for Sheds. Right now he is offering a free gift of a 24 page basic shed plan for a [http://www.designsforsheds.com/build-storage-building]12 x 8 Shed. Why not visit his site and see what all the fuss is about.
Article Source: [http://EzineArticles.com/?A-Basic-Guide-to-Build-a-Storage-Building:-The-Roof&id=6670773] A Basic Guide to Build a Storage Building: The Roof
Monday, March 3, 2014
Woodworking Projects
 Woodworking is one of the most rewarding hobbies I can think about it. A wood working project involve all the areas that a normal project has, but it comes with an additional component which is the personal feeling and emotions of seeing yourself accomplish the wooden pieces for your woodworking project. That is a sensation that it is very hard to describe.
When people ask about ideas for their wood working projects, I feel really involved and it is a never ending day of brainstorming ideas. You can get ideas all over, from the internet, magazines (below you can see some of them), family and friends. etc

The following steps are a must for you to have in any of your woodworking projects:
Woodworking ideas
The big question is from where you can get ideas for your wood working projects. As we mentioned before, the sources are endless, and I suggest you start with the sources I already mentioned. I will also gives you my best source for woodworking projects, plans and woodworking ideas:
Get Instant Access to 14,000 Easy Step by Step Woodworking Plans and Projects by Clicking Here.
Wood working projects: what are the steps?
One you have the idea for your woodworking project, you need a plan, what I mean with a pklan, is that you need not also a plan from start to finish but IO am also talking about getting or make wood working plans before you even start.
wood working plans, what is involved?
A woodworking plan will include not only a chart or draw of what you want to achieve but also the measures, kind of wood and tools you need for your project.
The woodworking plans will also include the exact step by step you need to follow to accomplish the result you want to achieve for your woodworking projects.
A big part of your plan is to be sure you have all the materials, or if you have to buy some wooden tools, and I can tell you that there are tons of tools some of them are very expensive and some dont. So you want to be sure that your woodworking project is executed within your budget.
What is next for you?
What I outlined so far is just the basic information for you to have an idea of what you need to start your woodworking project. Obviously, your wood working skills will take some time to develop, and the more you practice the more you master your skills. Thigs takes time, but if you follow the steps, you will feel good with your woodworking projects.
What If I want more details, Is there any source that I can recommend to get ideas or dig further on wood working projects?
If you are really interested in a good source I would suggest visit the following link where you can get tons of information regarding wood working projects and plans.
Wish all all the best in this amazing journey which is the woodworking hoby!
Viewer projects in the shop and out
Happy Monday! Hope you all had a good weekend. Dont forget to drop by tomorrow for the second installment of The Inspiration Project. Until then, here are a few viewer projects Ive been meaning to show off for a long time.
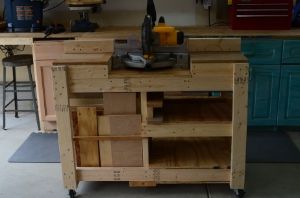
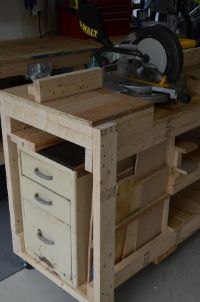
Lets start off with a couple of shop projects, since I am in the planning stages of a shop project for this weeks show. Heres one that has always been on my to-do list: a miter saw station. Thomas Queen cleverly incorporated an old file cabinet into his.
Read More..
Lets start off with a couple of shop projects, since I am in the planning stages of a shop project for this weeks show. Heres one that has always been on my to-do list: a miter saw station. Thomas Queen cleverly incorporated an old file cabinet into his.
*****
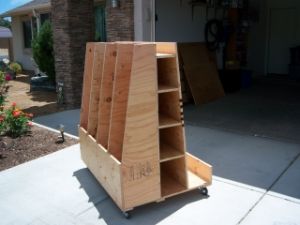
Tony in Arizona made this version of my rolling lumber cart, expanding it here and there. This is one of those projects that I wished I had built years ago. So handy.
*****
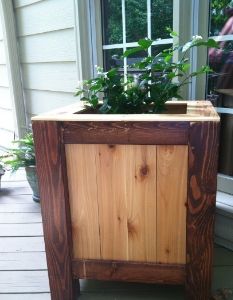
Moving into the back yard, we have a couple of planter boxes. 11-year-old Matthew Duffin did a great job building my $20 planter box from last year. Love the contrasting colors.
*****
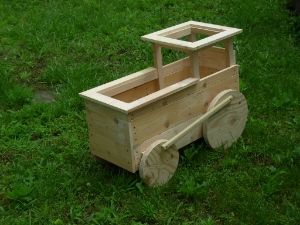
And heres a really creative planter built by Gary Finger.
*****
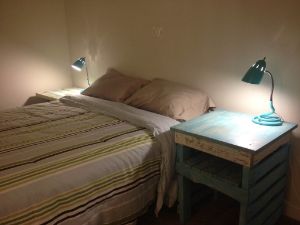
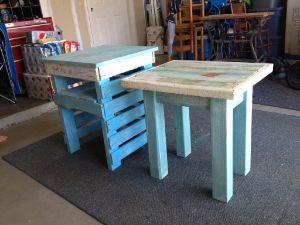
Moving indoors, we have some great tables. I just love how Erin Goff built these night stands using pallet wood. The paint on these is gorgeous.
****
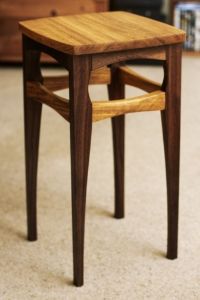
And check out the curves and joints on this exquisite end table Dave Bülow-Osborne made.
*****
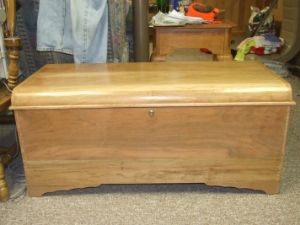
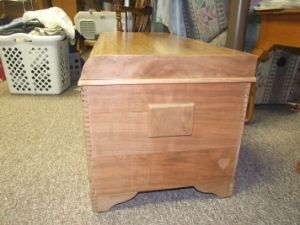
And finally, another Ramsey who loves cherry wood. Mike Ramsey made cherry hope chests for his daughters using wood from a neighbors tree that fell during a hurricane.
Raiding the Woodshed
I am currently away from home and visiting my parents in France for the festive period. So while away from my workshop and tools I certainly didnt expect to be making blog posts.
Lately, I have been reading a lot of stuff by Peter Folansbee. Peter uses predominately Oak which is not sawn but rived by splitting and it inspired me to go and have a rummage through my parents woodshed.

Walnut - which I think was felled early 2011

Oak of around 1.5ft diameter which was felled late last year 2010
While there are a few Oak & Walnut pieces, unfortunately, everything has been cut to firewood size lengths, but ... with some determination I might be able to get some stock for small boxes.

The Walnut looks like it would be amazing once dried, planed and finished!

Time to start playing - what tools have my parents got I can use?

Attacking a likely piece of Walnut - first some mark up.

Using a wedge to scribe all the lines before splitting anything. First lightly, then again to a depth of about 1/4 inch.

First split I am using an old axe head as its wider than the wedges. Its also as dull as dishwater!

Look at that grain! Once I trim the pith and sapwood Im sure there will be something usable...

Ok they are small but Im determined to use them for something

I wish I had a scrub or fore plane handy...

Next culprit - the mighty Oak. Marked out for eighths.

Again I deeply scribed all the lines before splitting.

Hmn ... not what I was expecting.

All splits completed. It helps to not separate each slice after its been split. This keeps the whole thing together and more stable until all the splitting is done. The hatchet is then used to cut the final fibres and release the slices.

Straight grained Oak - I wish these pieces were three times as long! I could easily get 2"x2" lengths for a joined stool

The haul - An hour or twos work with a hammer and wedges. I further re-split each eighth of Oak into sixteenths.

If I had a froe Im sure this Oak piece would split cleanly again into 32nds.
All in all its been a fun afternoon and I have actually learned something useful. I was surprised how accurately the wood can be split if scribed first. In most cases I split the line and couldnt have been more accurate with a saw. I will see how this stock dries out and see if it inspires me to build something. If not - mum has already been eyeing it up for the fire. Its such a shame that the trees were cut down and logged before I started this wood working journey.
There are still a couple of Walnut and Oak trees on the property which my parents are thinking about removing - rest assured it will be me with the chainsaw claiming first dibs! This fun little exercise has given me the confidence that I could produce usable stock from a complete tree trunk with very basic tools. Imagine breaking reliance on the Timber yard! - From tree to furniture, now thats a satisfying journey!
Merry Christmas everyone!...
Subscribe to:
Posts (Atom)